Showing posts with label Shabby Chic. Show all posts

Sunday, January 2, 2011

Introducing..!

The reason I was absent from my blog, along with just about everything else in my life, for so many weeks preceding Christmas, is because I decided to make handmade gifts for everyone in my family. I absolutely loved doing it - my only regret is that I didn't have more time, even though I started very early. I love to pay attention to detail (sometimes to a fault...) and so I usually just went without sleep. For my Grandma, I made paper dolls, but for my parents, brother, and boyfriend I made mini chip-books based on each person's individual hobbies and loves. It was a ton of fun. I've decided I'll showcase 1 per week (probably..) to get through them. Truth be told, I should probably save this one for last, because it is my personal favorite. Although I have favorite pages in each book, this one tugs my heartstrings more than the others.

Anyway, this is the one I made for my boyfriend, Josh. The topic? Our baby, our dog, Diego, who we adopted over 2 years ago, and lives with Josh. They say we rescued him. Some days, I feel it's the other way around. He is the light in our life. :)

. . .

This is the cover. I can't tell you how excited I was to find this image on A Child's year -Diego runs faster than my eyes can move - it was perfect. :)

Album by colorbok; patterned paper (the paper studio); die cut and title - Provo Craft (A Child's Year); Enamel Accents (Ranger); Pawprint ribbon (Ribbon Boutique); Tim Holtz Tiny Attacher; Bone brads (Recollections); mini alphas (Making Memories).


<-- This is my favorite page in the album. Is he not the CUTEST? I hadn't planned to do a dog 'narrative' in this book - until I printed this picture. I couldn't picture it without him leading the reader through the pages.

Souffle pens by Sakura; Stickers from The Paper Studio; Embroidery floss; foam dots.


Josh & Diego at their first visit to my house. Love it. Again with this die cut - I couldn't wait to match it up with a picture of these 2.


Paint dabbers (Espresso and Cloud Blue - Ranger); Linen Closet stack (DCWV); die cuts (Provo Craft - A Child's Year); souffle pens (Sakura); Enamel Accents; mini alphas (making memories); buttons from my stash.


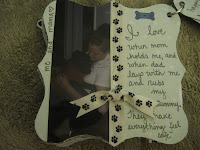
It was no easy task to find a way to fit 2 pictures on such a small page. This was their first long walk - to my grandma's house. :)


He lives for car rides - so naturally, he had a lot to say for this picture...


^ These 3 are all one page - with a little flap book. I left the page naked with just some edging. I spelled "guarding" incorrectly..but I'm not sure I even want to fix it (can you believe it?).


I ended up really like the way the pictures looked when cut to fit the page. Beware of those tonic scissors on photos, though - they scraped all over mine - eek. The "I heart" sticker actually said "I heart my dog", but I cut it in 1/2, and "stickled" it. Customization is key! ;)


I love this.


The back page - probably my second favorite. I did double-cursive on the title to make it pop.


So there we have album #1. Thanks so much for taking the time to check out this album - it's so special to me. I hope every one's 2011 is off to a great start - I'm so truly thankful for my new subscribers. :)

xoxo
Emily

Wednesday, December 15, 2010

Bon Voyage cards

As this school semester comes to an end, our school will say "see you soon" to 2 sweetheart students and their mom - they will be living in another country next term. They are special to me, and I'm making them cards before they go.


* This is a white 4x4 (fits A2 envelope!), with a grey 3 3/4" x 3 3/4" mat.
* The grey mat is stamped with Hero Arts Friend Definition in Milled Lavender, and the edges are ink blended with the same.
* The pearls in the upper corners are self-adhesive & lavender, from Recollections.
* The ribbon was sheer white, but I inked it with Dusty Concord. I hadn't yet done this with ribbon - love it!
* And last but not least, this chandelier, which I am in love with, is cut at 3" from the Summer in Paris cartridge. Cut out of DCWV paper from Pocket full of Posies stack.

^ Close-up of ribbon detail. I love this - I bet I will rarely use ribbon now, without inking it!


- - -

2 of these -- one for each girl:
* This is a white 4x4. The bottom is punched with a fiskars border punch (sorry, I don't know the name).
* The rainbow heart and all its layers are cut from the Create a Critter cartridge, at 2.5" (+ shadow). Glitter paper is DCWV.
* Coordinating eyelets are The Paper Studio and I love them.
* Purple scrap inside card to emphasize border punch, and edges are blended with Tumbled Glass.


- - -

I'd like to take a sec to talk about the cartridges I used for these cards, because they're 2 of my favorites.

First, Summer in Paris is one I bought back before I really got into using my Cricut. I think it was my third cart. ever - found it on sale at Archiver's. This cartridge is SO GORGEOUS, and semi- hard to find. All of the images are VERY intricate (so I wouldn't advise very small cuts). There are options for several 3d projects as well - this chandelier is one of them. The images are actually pretty versatile - there is a phone, hot air balloon, male & female silhouettes, bike, car, perfume, phrases, several Parisian landmarks, and more. It's not everyone's style, but if it's yours, I'd get it while you can. I love mine! You can read more and see the images here.

Second, how about that Create a Critter? This is BY FAR my favorite cart of my collection. It is filled with adorable animals, phrases, accesories and more. The card I've made here shows that there is a lot more than just critter layers on it. In fact, I love this cartridge so much, I'm tempted to write Provo Craft and suggest/ask if they have thought of coming out with a second one. I'm just sayin', if they can make a second Paper Dolls, there are tons more critters they could give us to create...You know it would sell like hot cakes.

- - -

I want to give a big friendly THANK YOU to Sammye Jo at 62 Cards. She put a link of my blog on hers to get some followers for me. :) She does the most beautiful work - and right now she's doing 12 Days of Giveaways! You've gotta see her. :)

Gotta get to work now. Many thanks for reading!!
xoxo


Wednesday, December 8, 2010

Fun Tuesday Things.

Check out this fun birdcage I made! I love the shabby look it turned out with (shocking, I know).

- Basic cream, lt. blue, teal, and kraft cardstocks.
- Aqua and Silver paint (I used a very light hand!)
- Rock Candy <3>
I made this with my new Cricut cartridge, Straight from the Nest – this was one of my Black Friday gifts to myself. :) It was one I hadn’t heard of before; I think once upon a time it was an HSN exclusive. It’s one of those that at first glance, looks pretty basic, but if you take a closer look it’s got lots of fun functions on the dedicated buttons. Ribbon Sliders, Corners, and more. I’ve been having fun experimenting with it. I also used it to make these Christmas accents for my December Daily album I’m working on:


Speaking of December Daily – what a fun idea! I first read about this in BHG Scrapbooks Etc. The whole idea of it is a low-stress way to create a keepsake album that displays all your holiday traditions for the year. The key to the low stress, as I understand it, is the fact that you are supposed to create the album pre-December 1st, so that you’re not all caught up in the pressure of coordinating everything. Haha, well…I didn’t discover the wonderful idea of December Daily until after Thanksgiving, so, I am just recording my thoughts each day, and I’ll make them into a project later. It’s not really my style to dive into something without a plan, so this is working out. I am making some embellishments as I go. Fun. :)


Amazing sale right now at CRICUT MACHINE. Free shipping on all orders, and amazing prices. I got Everyday Paperdolls (for a Christmas gift) for $21.95 total. Gadzooks!


Things I’m Loving:

* Tim Holtz’ 12 Tags of Christmas. I’ve never seen so much inspiration packed into such a short amount of time! Tons of fun ideas there to try. :)
* The DCWV package I got from HSN today. Umm - $45 worth of gorgeous paper for 10 bucks. Yes.
* My cricut Tool Kit. At first glance I thought it was another ploy for money – but as it turns out, those gadgets all really do serve a purpose!
* My recent Hero Arts clings!!...

GLEE Thoughts:
Well, I love Christmas, and I love Glee. It’s no surprise that the combination of the 2 left me giddy. I have no complaints – although I’m still not happy with the Finchel storyline. A smirk in her direction at the very end, while they’re huddled around the Christmas tree? That doesn’t cut it! However, love the Brittany/Santa plot, and in keeping with tradition, Artie’s Christmas gift and Becky’s “Christmas came anyway” made me burst into tears.


And just so everyone knows...it's seven degrees outside right now. Seven.
xoxoxxoo

Monday, October 11, 2010

A cricut, a cuttlebug, and tim holtz walk into a bar...

So, couple of things...

Made this card for Grandma, for her birthday which was yesterday. I was really excited to use lots of new things. I challenged myself to explore with my Cricut, because I haven't used it much since I purchased it (over 1 1/2 yrs. ago)...to be honest, the machine sort of intimidates me. At least it has up until now. I'm getting more comfortable. :) I cut out some balloons from the Stretch Your Imagination cartridge, before inking and stickling them. (Yes, I just made stickling a verb...)

I also was stoked to use the cuttlebug for some texture and my very first cuttlebug die cut. The die cut I did, is one by Tim Holtz. They're called Alterations, and I absolutely love them - however, they are intended for Sizzix machines. Through my repetitive watching of THIS Youtube video, I was convinced to spring for one, as she very efficiently proves that they are in fact compatible with the cuttlebug. So the other night I got the Baroque die cut. I cut one to add to this card, after inking it and embossing it with Swiss Dots.

Distress Inked + stickles


Swiss Dots


So when I first cut a balloon, I had it on the wrong size dial, which resulted in this teeny tiny balloon. Always trying to use it all up, I was excited when I realized I had the perfect use for the little mistake. A touch of red sharpie and voila! :)


So I'm finally getting to explore a little bit with the T.H. Compendium of Curiosities. First up, the Shabby Chic technique:
I was thrilled with how this technique turned out. This is just a plain grunge heart (mixed minis set). The paint dabbers I used were sunset orange and espresso. *TIP: rather than using the actual dabber foam top, i dabbed it on and then used my finger to spread it all around. a much smoother look.*

Next up, 2 techniques layered in one. The background coloring is the Wrinkle Free Distress, and I am actually blanking on the name of the other technique. I do know that it didn't work the best for me. It had to do with Perfect Pearls over a distress stamped image, and then misting water so that the ink would wick out from beneath the powder. Well, my ink ran. But I'm ok with the finished product:

^ prisma glitter over stamped image

Finally, I did some experimenting with my mini misters. I have only made one concoction so far, but as I was warned, I am addicted. I just mixed some bronze p.p. with a full tube of water. I spritzed it over this ornament tag, and also over this imitation grunge flower I made.


^ close-up showing mini mister detail! :)


As a P.S., that imitation flower was made using the cricut (george & basic shapes) on 'shadow blackout' at 2 1/2 inches. I used Scattered Straw distress ink, Golden Rod stickles, and a spritz of my DIY mixture. Gave it to my mom as a Get Well flower - she and I are both peuny!

xoxo